
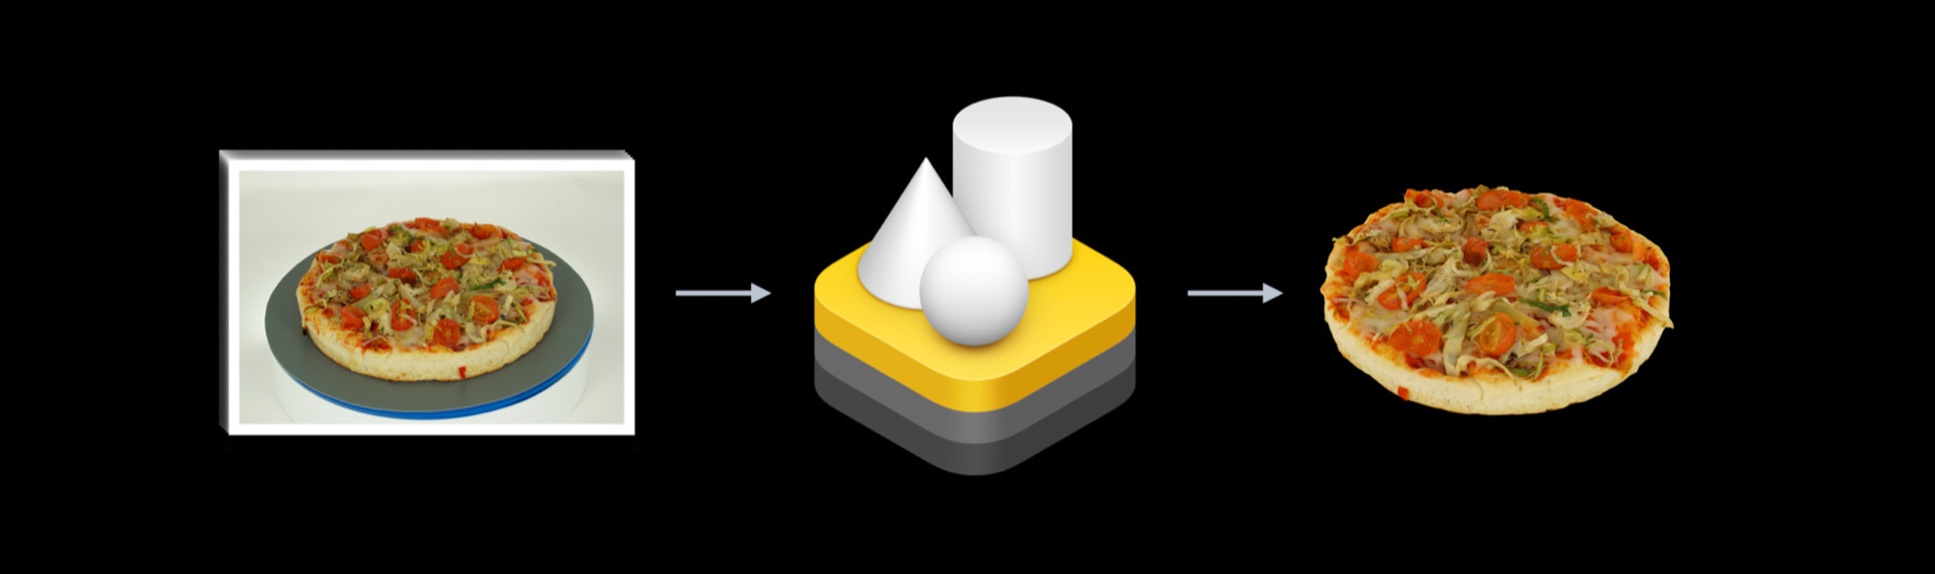
3DScanner provides a quick and easy way to create lifelike 3D models of real-world objects using just a few images without LIDAR feature requirement. Learn how you can get started and bring your assets to life with Photogrammetry, explore your models in AR Quick Look, and discover the flexibility, versatility and power of USDZ, GLTF, GLB... for your 3D workflows.
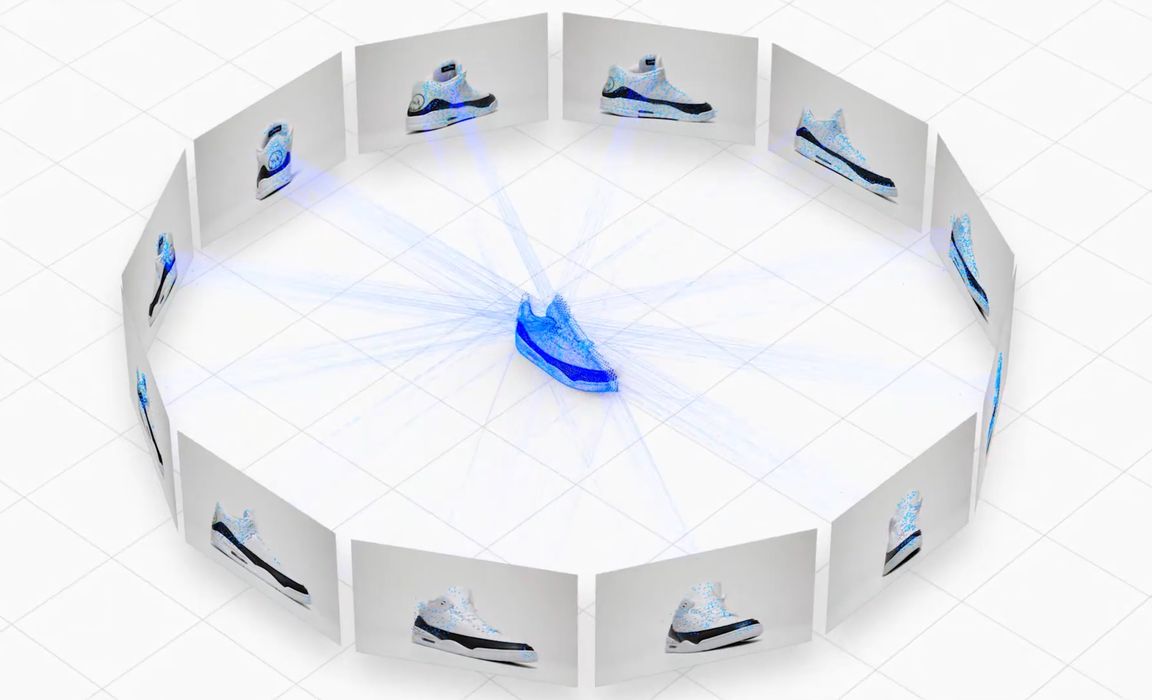
With 3DScanner, you can create 3D objects from photographs using a process called photogrammetry. You provide a series of well-lit photographs taken from many different angles. 3DScanner analyzes the overlap area between different images to match up landmarks, and then produces a 3D model of the photographed object.
To generate the best 3D representation from the object-creation process, provide 3DScanner with high-quality, high-resolution photographs that don't contain hard shadows or strong highlights.
Choose objects that are static and won't bend or deform while you're taking photos. You can move the object between shots in order to photograph all sides, but a soft, articulated, or bendable object that changes shape when you move it can compromise 3DScanner's ability to match landmarks between different images, which may cause 3DScanner to fail or produce low-quality results.
Avoid objects that are very thin in one dimension, highly reflective, transparent, or translucent. Additionally, objects that are a single, solid color or have a very smooth surface may not provide enough data necessary for the object-creation algorithm to construct a 3D shape. You can draw or paint on the surface of an object to add color or texture, then match the original color or texture on the created 3D object with the material inspector in a 3D model viewer or the property inspector in a Composer.
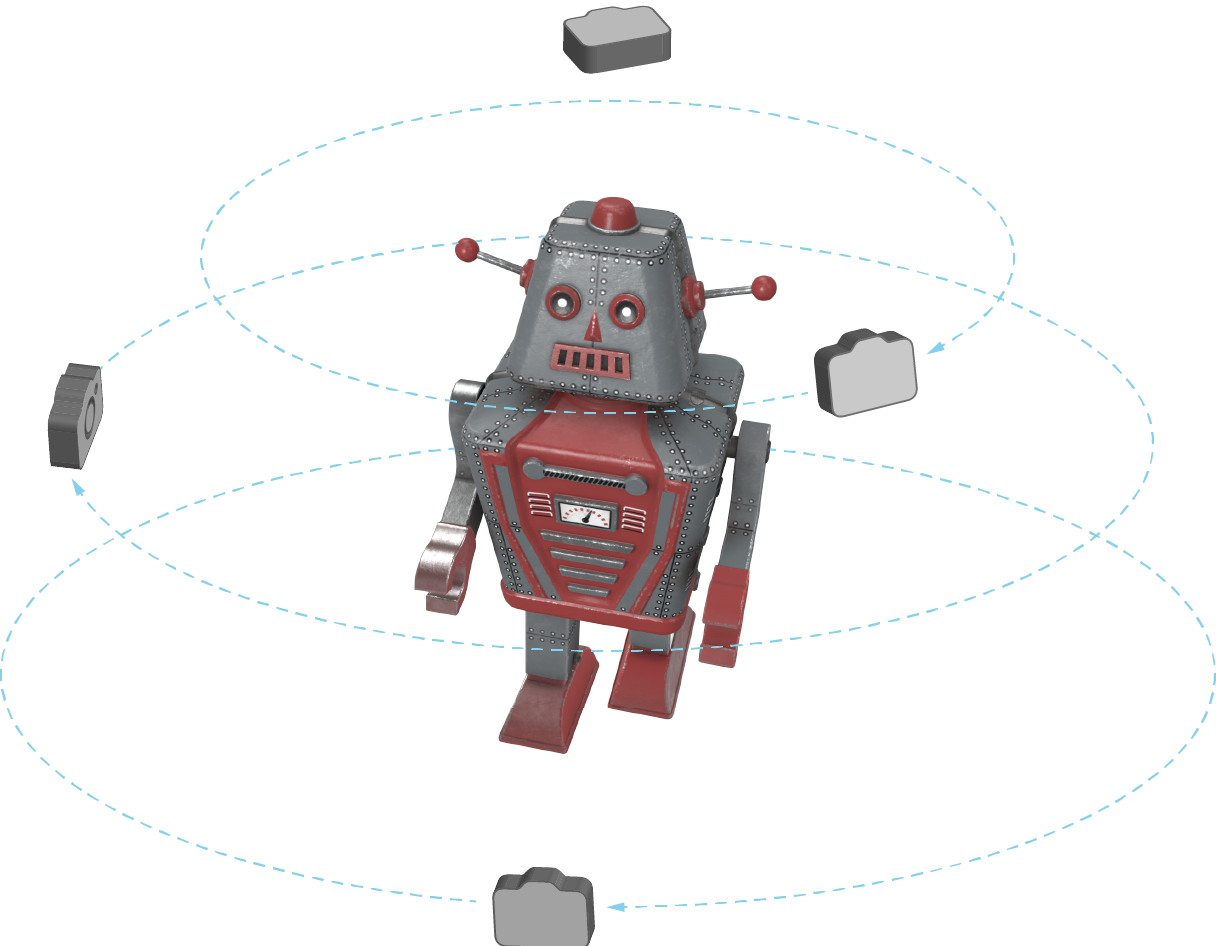
You can approach taking photographs for object creation in two ways: Either move the camera around the object, taking photographs from different angles at different heights, or put the object on a turntable and rotate the object while taking pictures.
When using a turntable, take pictures in front of a well-lit, solid color background to minimize extraneous image data that can interfere with the object-creation process and use a tripod if available. Standing the object on different sides while photographing it on a turntable captures the entire object with no gaps or holes.
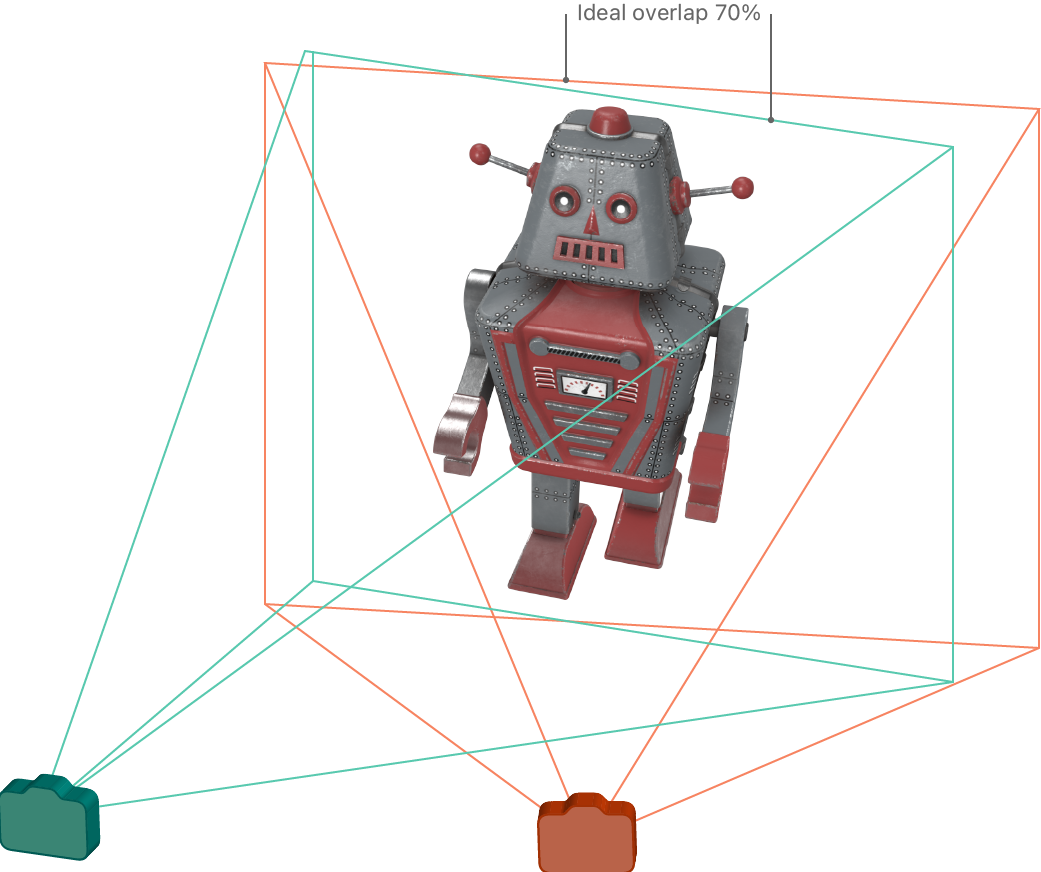
The number of pictures that 3DScanner needs in order to create an accurate 3D representation varies depending on the complexity and size of the object, but adjacent shots must have substantial overlap. Position sequential images so they have a 70% overlap or more. Anything less than 50% overlap between neighboring shots, and the object-creation process may fail or result in a low-quality recreation.
3DScanner object creation accepts images captured by any digital camera, including the cameras on an phone, a DSLR or mirrorless camera, or even a camera-equipped drone. If your source images contain depth data, 3DScanner uses it to calculate the real-world size of the scanned object. 3DScanner can also create objects from images without depth data, but you may have to scale the object when placing it into your AR scene.
Position the object so it fills as much of the camera's frame as possible without excluding or cutting off any part. Use an aperture setting narrow enough to maintain a crisp focus. Shoot at the highest resolution your camera supports and use RAW format if possible.
Shooting with a narrow aperture requires more light but gives your photographs a greater depth of field, increasing the area of the object that's in focus. If you don't have enough light to use a narrow aperture, consider increasing your camera's ISO setting or adding more light.
In low-light situations, cameras with autofocus can have difficulty finding and maintaining focus. Focus manually if there isn't enough ambient light to get a focus lock, and put your camera on a tripod to make sure you keep it steady. Use a remote trigger, such as the Apple Watch Camera Remote app, to make sure the camera doesn't move or shake when you press the button to take a photo.
Use diffused lighting if possible. Hard light, such as from an on-camera flash, direct sunlight, or a bare light bulb can cause problems during object creation. This type of lighting casts hard shadows that can confuse the photogrammetry algorithm. Instead, bounce the light off of a reflector, a wall, or the ceiling, or put a diffusing material like a lamp shade or thin white fabric between the light source and the object. You can also use light modifiers or a light tent designed for photographing objects.
When photographing an object outdoors, keep the sun out of your images if possible. Shoot at midday so the sun is high enough in the sky that it won't be visible in any of your images, or shoot on an overcast day.
In order to ensure that 3DScanner can match up landmarks between overlapping photographs, keep your camera settings as consistent as possible from shot to shot. If possible, don't make changes to any camera settings while shooting, including the focal length (zoom), aperture, shutter speed, or ISO.
If your camera offers manual control of any settings, set those values to keep them consistent between shots. When shooting with the camera on an iPhone or iPad, you can lock the exposure and focus settings by long-pressing the image feed view until you see “AE/AF Lock” appear at the top of the screen.
In addition, masking out objects in the background so the image only contains the object you're capturing removes unnecessary data that can confuse the photogrammetry algorithm.
There may be times when you can't capture images under ideal conditions, such as when photographing a large object in a crowded public space. Adjust for image shortcomings using an image editor. Modify a photograph's contrast, brightness, sharpness, or exposure to compensate for problems in the original capture.